In an earlier article I described how to send RF/wireless data between two Attiny85 chips with a 433 MHz transmitter/Receiver pair.
Now I will give a more practical program that sends 3 variables from an LDR and a DHT11 sensor.
The connections are simple
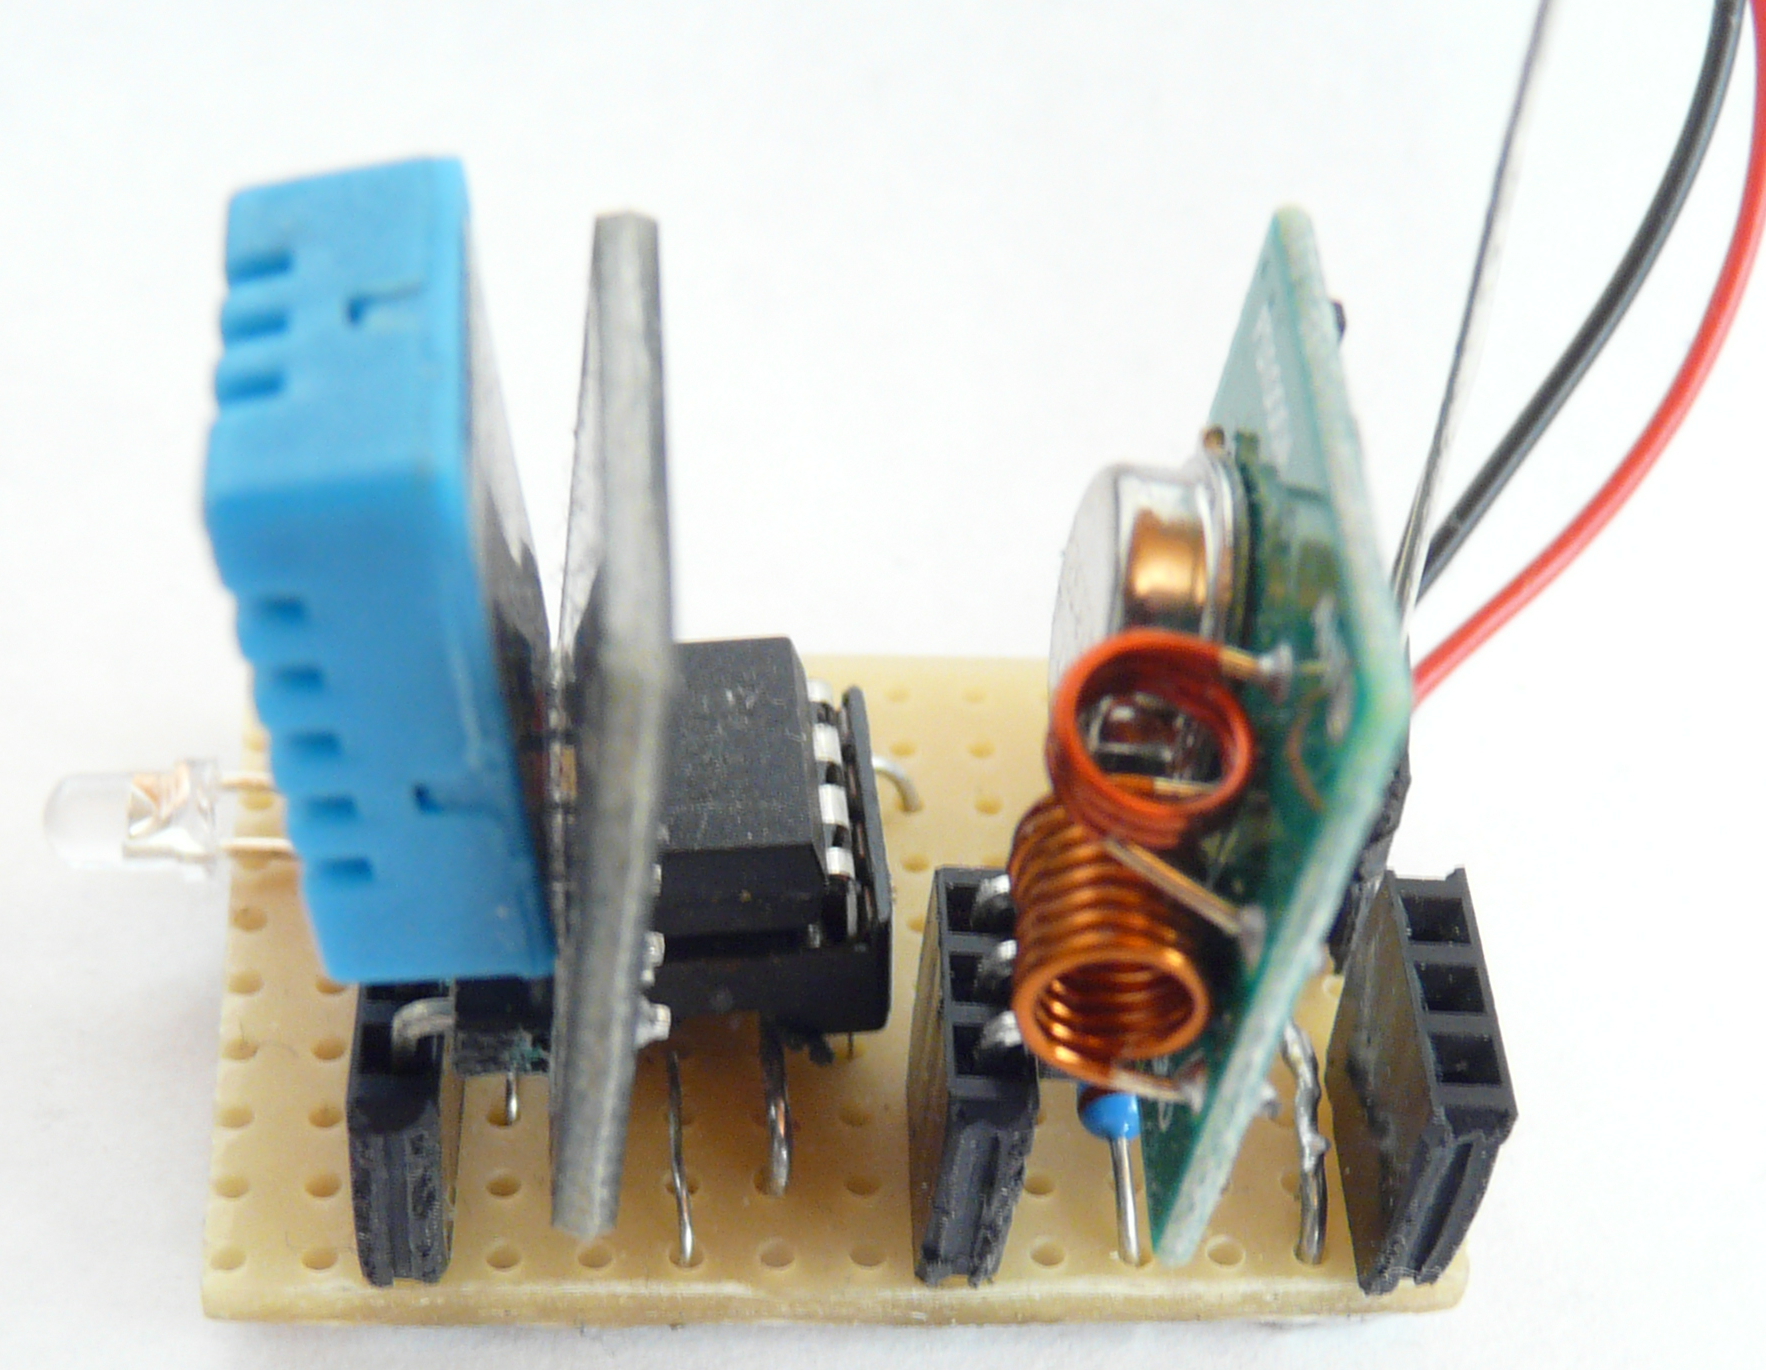
The transmitter is connected to D0 (pin 5). The DHT11 sensor is connected to D4 (pin 3) and an LDR connected to A1 (pin 7), with the other end connected to Vcc and a corresponding pull down resistor.
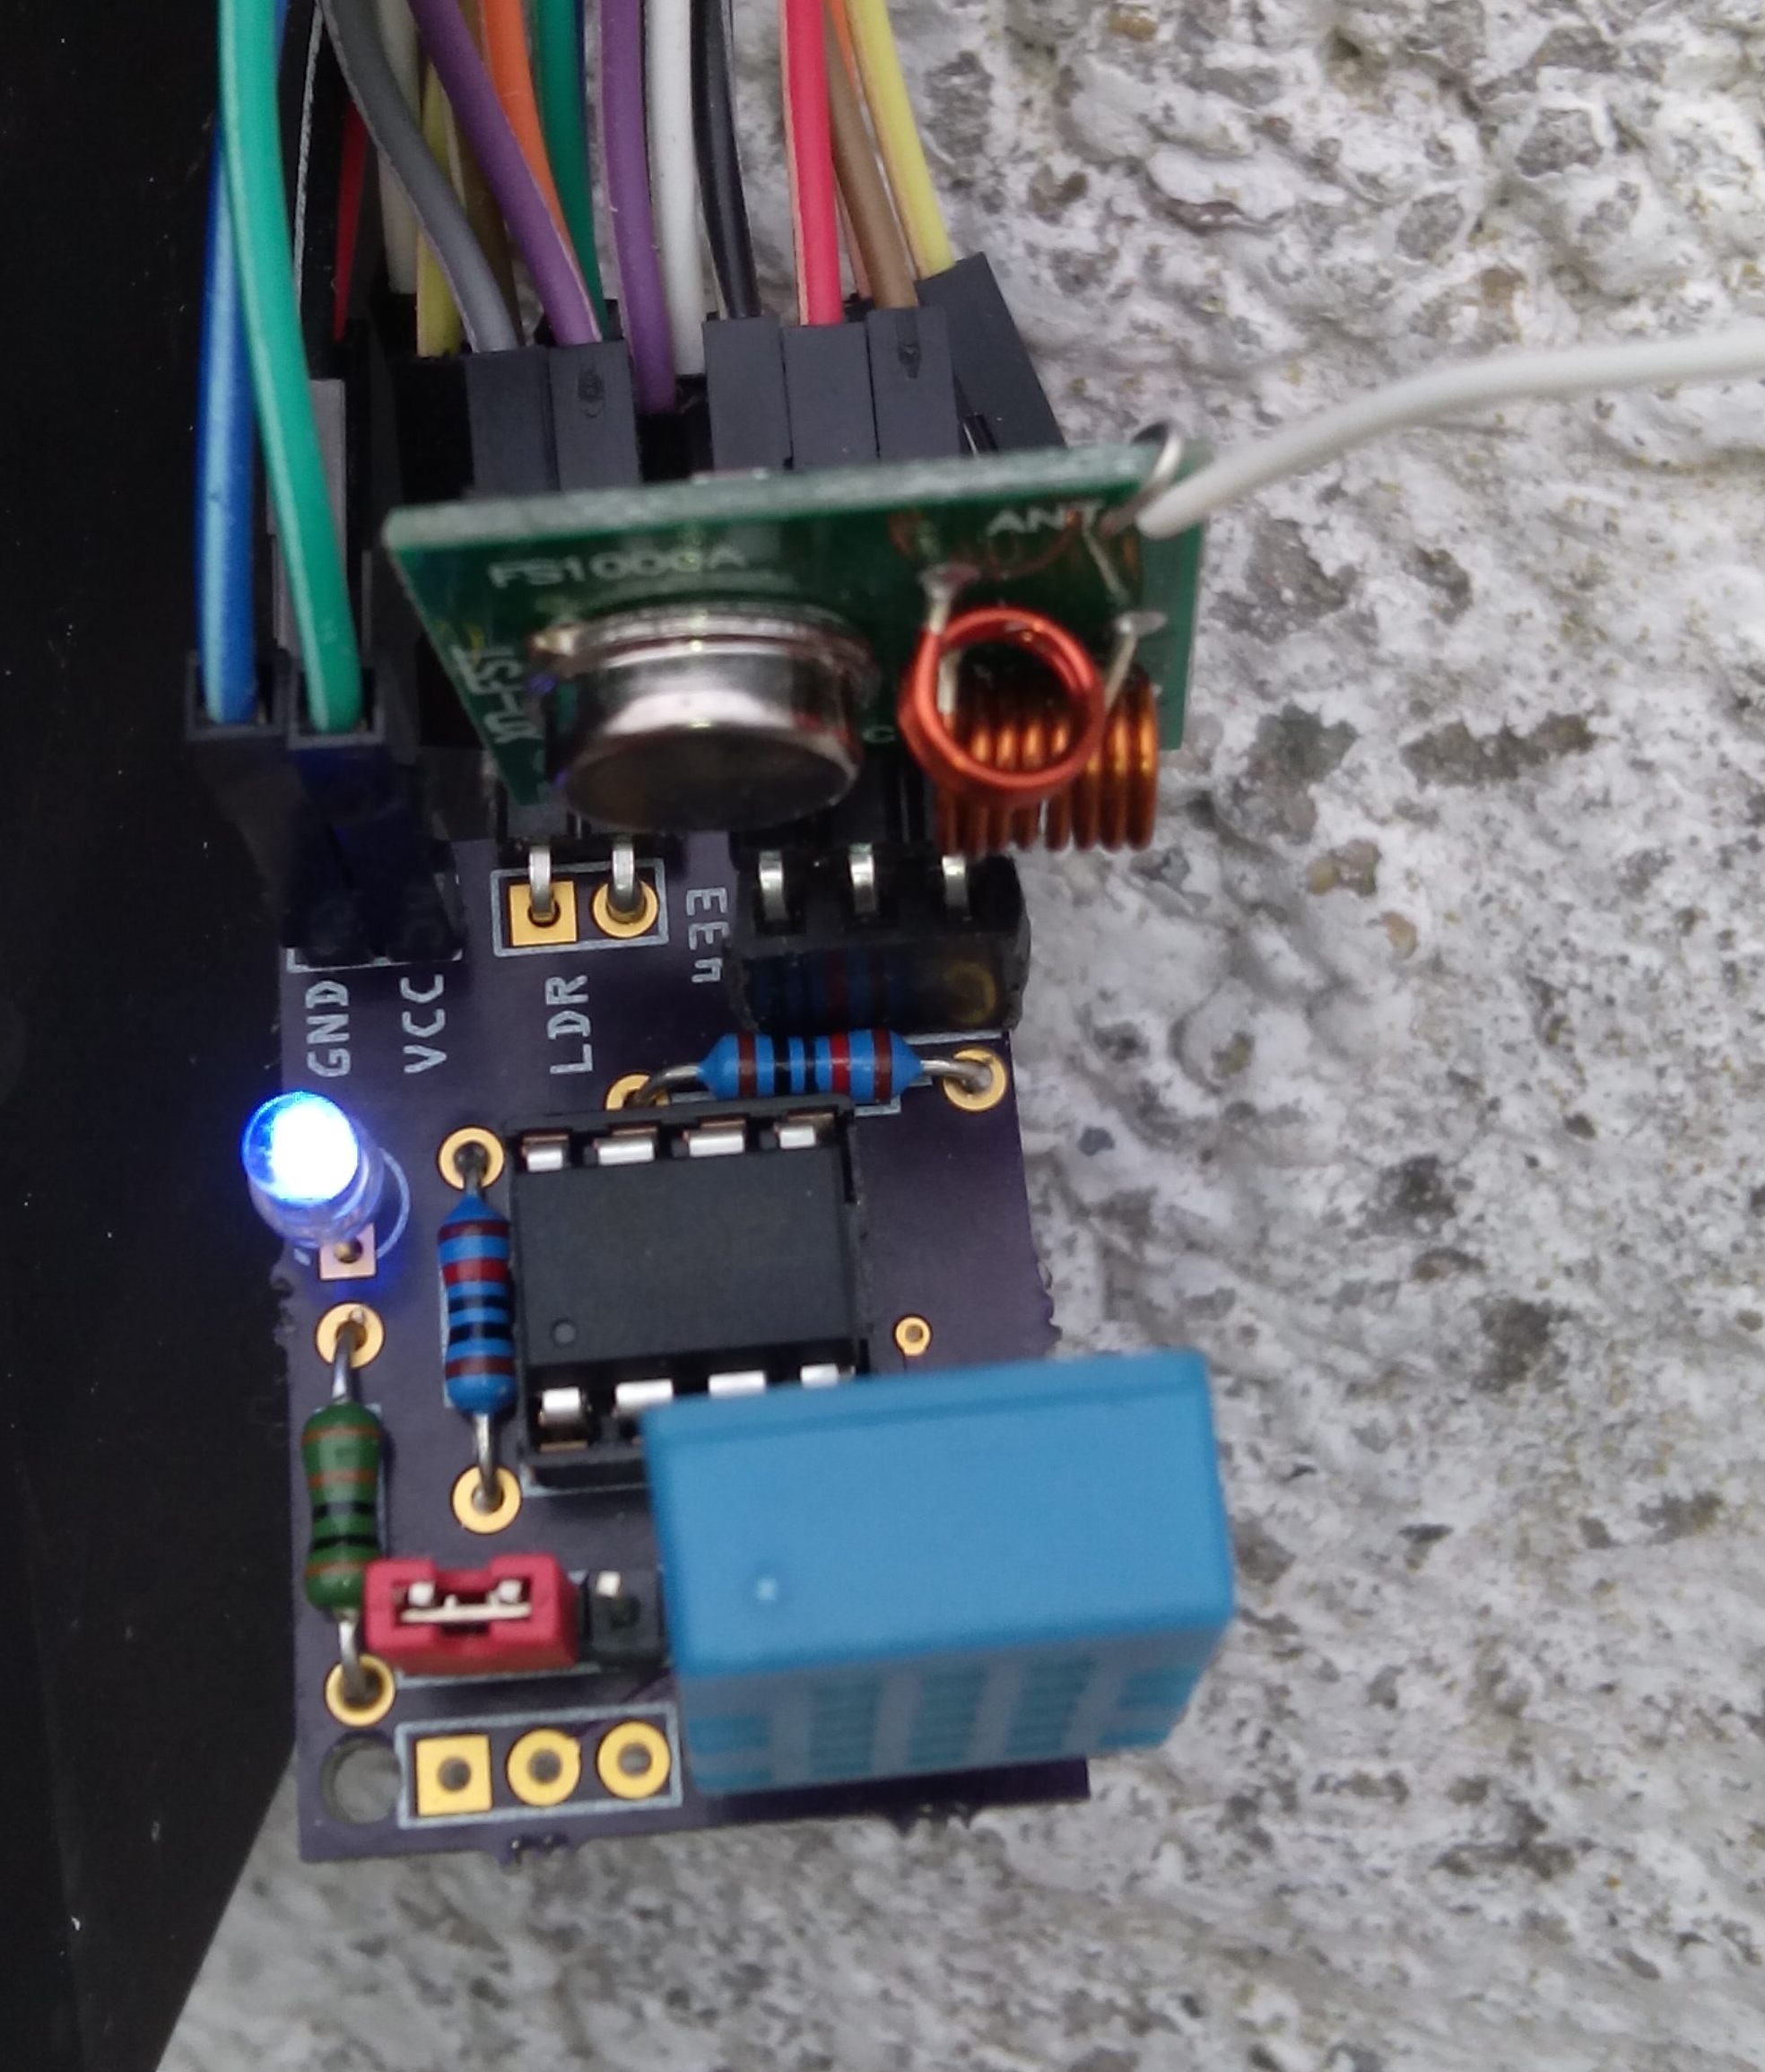
The big photo shows a test circuit on stripboard, The smaller picture shows the final PCB. The huge amount of cables at the top doesn’t mean much, I just use a few
/*
Pin 2 =A3 D3
pin 3 = A2 D4
pin5 =D0
Pin 6=D1
Pin7= D2 A1

LDR=A1
PIR= D1
RF433=D0
DHT11=D4
LED=D3
*/
// libraries
#include <dht11.h> //Rob Tillaert
#include <Manchester.h>
dht11 DHT11;
#define DHT11PIN 4
#define TX_PIN 0  //pin where your transmitter is connected
//variables
float h=0;
float t=0;
int transmit_data = 2761;
int transmit_t = 0; // temperature
int transmit_h = 0; // humidity
int transmit_l=0; // lightlevel
int transmit_p = 0; //PIR
int transmit_s = 0; /Station identifier
byte ledPin=3;
int light=0;

void setup() {
pinMode(1, INPUT);
pinMode(ledPin,OUTPUT);
man.setupTransmit(TX_PIN, MAN_1200);
}

void loop() {
int chk = DHT11.read(DHT11PIN);
h=DHT11.humidity;
t=DHT11.temperature;
transmit_h=2000+h;
transmit_t=2100+t;
transmit_l=2200+(analogRead(A1)/10);
transmit_p=2300+digitalRead(1);
transmit_s=2500;
digitalWrite(ledPin,HIGH);
man.transmit(transmit_h);
delay(200);
man.transmit(transmit_t);
delay(200);
man.transmit(transmit_l);
delay(200);
digitalWrite(ledPin,LOW);
delay(1000);
}
The idea of adding a number, in this case in the 2000 range is to be able to identify what (which station) is sending the data: any 2000 number I know is humidity, any 2100 number I know is temperature, etc. Variables h and t are floats that can have decimals. As I am only interested in 2 digit accuracy, I just add them to an integer and thus turn them into integers. WIth regard to the lightlevel as it is an analog read it might be as high as 1023 (theoretically), so when it is divided by 10, the range will usuallu be 99 max a two digit number. If by any chance it would be 100, the transmitter will send a number as 24xx. The receiving software then knows it is a more than 2 digit value, but that will be very rare I then send 5 values: Humidity, temperature, light PIR and a station identifier ending the data. The receiving station then can identify where it came from and process the incoming signals (starting by dividing subtracting the first two digits).
WIth regard to the lightlevel as it is an analog read it might be as high as 1023 (theoretically), so when it is divided by 10, the range will usually be 99 max a two digit number. If by any chance it would be 100, the transmitter will send a number as 24xx. The receiving software then knows it is a more than 2 digit value, but that will be very rare
It takes 3374 bytes so I could compile it in an Attiny45.
See also: DHT11 on Attiny85
Attiny DHT 11 & 433 MHz (with Oregon code)

My Oregon Scientific Temp & Humidity sensor is broken, so I an going to redo your project (with a DHT22). Since it is the outdoor sensor I will put a lot of effort in going into sleep mode, not using voltage regulators, etc. It will need to “talk” the Oregon Scientific protocol so that it will update the Oregon Scientific console in the living room. Automatically then, my Nano based receiver will see it (it also picks up the other sensors) and passes it on to Weather Underground. I am pretty confident that will fit an ATtiny85. I’ll give it a DigiSpark booktloader (micronucleus), just because I can 😉
Sorry to hear that. If I didnt have a stack of DHT11’s I would be using DHT22 as well as it is more precise. I presume you might be using a coin cell 3.3 Volt? Currently doing some experiments with that. Putting the Attiny to sleep is not such big problem, but getting enough range on 3.3 Volt might be an issue.

There is a lot that fits into the Attiny. Picture was a prototype. Using this one now. Sending it to another Attiny85
Just done getting the Attiny to read a bmp180 for pressure that I will now try to merge with the existing program. Should have enough memory
Im working on a similar project now. Did you succeed with the coin cell battery? I need to create an as small as possible transmitter with ultra low power. Don’t need high distances, around 8 meters will be enough. Can I achieve this with this setup?
Mehemenuri, it has been quite a while since I worked on this. Having said that, I did some 3V3 experiments with these cheap transmitters and found that even at 3V3 the reach is still substantial (at least all over my house), as long as you have a good antenna, and or a stable transmitter. I found the transmitters that have a crystal for their oscillator (and are still around 1 euro) to be reliable at 3V3.
But that was not with Manchester code (not using that anymore) but with the regular 433 RC protocol
I was more thinking along the lines of three NiCd AA or AAA and an additional solar cell. I might scavenge that from the original sensor, or just throw something together.
That PCB is a lovely little bugger!
I have a cheap 9 volt 2 watt solar cell lying around (too many projects) that I intend to use for that. Maybe use the 9 volt for the transmitter and 5 Volt for the Attiny. With a bit of luck i can feed a 6 Volt irrigation pump with that as well on a sunny day, but that is when it is most needed 🙂
Thanks for compliments on the PCB. Decided to let OSHPark a go at it. Got three for USD 5,-
It basically breaks out the pins in a servo type config ( Signal, Vcc, Ground) and has an LED that I can switch off in favor of an other break out to a pin header. Quite universal in use, all within 1 square inch. No use taking a tiny chip and put it on a huge pcb
What libraryes are you using?
Ah yes, in spite of me always keeping an eye on that, they fell victim to html code interpretation. I use the Manchester library and the dht11 (from Rob Tillaert)
Hi. First: Thanks for the howto!
Question: What if I’ll use 2 or more sensors… don’t I need a network ID or sth., so all the sensors can be distinguished by the receiver (or the reading software like fhem)?
Well you can make it as complicated or simple as you want. I just send a station ID together with the data
Hi! Thanks for the article. It helped me alot in creating my own version of wireless DHT sensor. Here’s what I’ve got so far http://mchp.blogspot.com/2016/11/wireless-dht22-sensor-20-using-attiny85.html
Good job. I didnt know about the smallDHT library. Good to know. Thanks.
Although I really like the attiny85, I have not been using it often lately as the price difference with an pro mini is small, unless using surface mount.
Ofcourse for LowPower apps like these stations it still is the best choice. Feeding the transmitter with 4.5 Volt should not be a problem. In ESP8266 applications I have been feeding it with 3 Volt and it still had a considerable range… as long as one uses a decent (but still cheap and easy to make) coil antenna.
Thanks for the info