Sometimes in a web application you want different pictures to appear, depending on a condition. For many die hard programmers that will be a piece of cake, but for may others it isn’t.
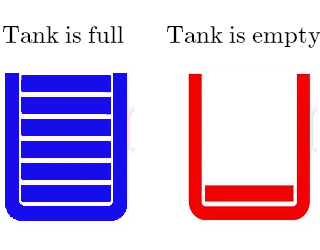
Suppose you have an application that monitors if the level in your water tank is full or not completely full yet (say with a float switch) and you want a picture to appear that either shows a full tank, or a not so full tank. Your sensor sends either a ‘0’ or a ‘1’, depending on whether the switch is closed or open.
Say you get that state either via a json or a GET or a PUT. Just as example I presume it comes in via a json and it’s name is ‘level’
You start with some HTML that looks like this:
HTML
<!--Container for picture -->
<div>
Tank is <span id="tank"></span>
<p><img id='img' width="50"></p>
</div>
You then add some Javascript that looks like this:
JavaScript
var l=jsonData.level
if (l==1){
document.getElementById("tank").innerHTML="full";
var imageshown="/images/full.png"
}else{
document.getElementById("tank").innerHTML="not full";
var imageshown="/images/empty.png"
}
document.getElementById('img').src=imageshown
This is how it works:
The HTML basically says “Tank is …..” and then goes to show a picture with the ‘img’ tag. It is just that some parts still need to be filled in . The parts that need to fill in we have given an ‘id’ by which they can be recognized. Those id’s we have called ‘tank’ and ‘img’, but they could have had any other name.
Then in the Javascript we make use of the DOM programming interface. DOM stands for Document Object Model, it is a programming API for HTML and XML documents. It defines the logical structure of documents and the way a document is accessed and manipulated.
Assumed that the state of the tank is contained in a JSON element called ‘level’. That state is read and assigned to the variable ‘l’.
We then make use of ‘document.getElementById’ that is a method of accessing element in HTML. In this case, we use the id ‘tank’, that we have defined before in the HTML.
We then get or control the content of that object we just have identified, with ‘innerHTML’. In our case it means that we replace the identified element “tank” with either the text ‘full’ or ‘not full’.
Also, depending on the state of the ‘l’ variable, we define the ‘imageshown’ variable with the path of either the ‘full’ image, or the ’empty’ image. We then use the ‘document.getElementById’ method again to identify the ‘img’ object in the HTML and use innerHTML to replace it with the path to the appropriate image.
Obviously, one can add html tags to the replacement content: for instance:
document.getElementById('vijver').innerHTML="<span style='color:red'><i>not full</i></span>";
will make the text appear in red italic.
Mind you that depending on where you put the javascript, you may need to put <script> </script> tags around it (e.g. when it is directly in your HTML).
Where the above example uses the ‘innerHTML’ method to insert a picture, it is alos possible to send a picture directly to the server with ‘server.on()’ as the example below shows:
// Include the necessary libraries
#include <ESPAsyncWebServer.h>
#include <LittleFS.h>

// Create an instance of the web server
AsyncWebServer server(80);

// Define the temperature threshold
const float temperatureThreshold = 10.0;

// Function to get the temperature
float getTemperature() {
  // Implement your logic to retrieve the temperature
  // and return it as a float
  float temperature = /* Your temperature retrieval logic */;
  return temperature;
}

// Function to serve the appropriate image based on the temperature
void handleMeter(AsyncWebServerRequest *request) {
  // Get the temperature
  float temperature = getTemperature();

  // Determine the image file to serve based on the temperature
  const char* imageFile = (temperature > temperatureThreshold) ? "/hot.png" : "/cold.png";

  // Serve the image file
  request->send(LittleFS, imageFile, "image/png");
}

void setup() {
  // Initialize LittleFS
  if (!LittleFS.begin()) {
    Serial.println("Failed to initialize LittleFS");
    return;
  }
In this example we use the LittleFs Filing system to store two files called ‘hot.png’ and ‘cold.png’. We set a treshold temperature of 10 degrees Celsius and if above 10 degrees we send the image file ‘hot.png to the server and if 10 degrees or lower, we send the image file ‘cold.png’ to the server.
